Finishing is where a laser-cut piece stops looking like a laser job. Soot halos, fuzzy fibers, blotchy stain and bubbly resin are the usual problems, and each has a known cause. Here are the steps in the right order, with numbers from data sheets instead of guesses.
Quick answer
- Order: sand, seal or mask, laser, clean, seal the fresh cut, add color, pour resin, then clear coat. Wax goes last and never under resin.
- Soot: mild soap, a melamine eraser or light sanding at 180–220 grit. Use as little water as you can on thin plywood. Baking soda is not a proven cleaner.
- Stain on birch: birch is blotch-prone; Minwax lists it for its pre-stain conditioner. Dyes show the grain, pigments sit on top.
- Epoxy for a 3 mm map layer: a coating resin in thin layers (ArtResin: 3 mm per pour; TotalBoat Artist Resin: 1/4 in per coat). Deep-pour casting resin is overkill.
- Before any pour: seal the wood, keep wax and oils away, torch lightly and follow your resin's data sheet for temperature and cure.
- Food safety: make no food-safe claims for wall art.
In what order should you finish laser-cut wood?
Most finishing problems come from the right steps in the wrong order. Magnuson Studio, a maker business, paint-fills engravings in this sequence: "Sand → seal → cure → mask → engrave → clean → seal the recess → paint → unmask", because "the laser exposes new raw fibers." For a layered map with resin water:
- Sand the faces before the laser, while the sheet is still flat and whole.
- Seal or mask the face. Thunder Laser says a coating "stops any burnt matter from getting into the grain".
- Engrave and cut.
- Clean the soot with as little water as possible.
- Seal the fresh engraving or cut-out.
- Add color (paint-fill, stain or dye), then remove the mask.
- Seal coat, then pour epoxy in thin layers where the water goes.
- Clear coat everything else. Wax, if you use it, comes last and never where resin will go.
Gluing and aligning the layers is covered in our guide to layered laser art.
How do you stop soot from sticking in the first place?
Smoke residue settles around every engraving and cut. Masking is the simplest barrier. OMTech recommends applying "blue painter's tape or vinyl transfer tape to the bare wood before engraving to prevent smoke residue from sticking", and Epilog notes that finished woods and masking "provide additional barriers" against smoke settling into the fibers.
Masking has limits. xTool says tape is "ineffective for cut edges", and makers on the Glowforge forum skip it on fine photo engraving and sand afterwards instead. On "vinyl" tape: PVC must never go under a laser, and we could not verify which transfer tapes are PVC-free, so paper tape is the safe choice. Air assist, focus and the bed are covered in our guide to preventing laser burn marks.
How do you clean soot off laser-cut plywood?
Start gentle and step up only when needed. Thin plywood warps: a LightBurn forum user reported that a water-based hand disinfectant warped basswood samples, and a Glowforge user cleaning with melamine ("magic") erasers uses "only small amounts of water to prevent warping".
| Method | When | Who recommends it | Watch out |
|---|---|---|---|
| Mild soap and water on a microfiber cloth | Light marks | Snapmaker | Keep water to a minimum on thin ply |
| Art gum eraser or melamine eraser | Light marks on flat faces | Snapmaker, OneLaser | Same: barely damp |
| Stiff nylon brush or old toothbrush | Soot inside engravings | OMTech | Scrub gently |
| Denatured alcohol or mineral spirits on a cloth | Stubborn soot | OMTech; Thunder Laser calls alcohol "a last resort" | Tiny amount; test on sealed parts |
| White vinegar | Light soot | OMTech cleaning guide, LightBurn forum | Little liquid on thin ply |
| Waterless or pumice hand cleaner | Brushed into engravings | LightBurn forum, OMTech, Thunder Laser | Forum advice: no ammonia |
| Acetone | Small spots | LightBurn forum; OneLaser | "Light use only; test on scrap" |
| Oxalic acid, diluted | Dark stains | OneLaser: 5–10 minutes, rinse, dry | Gloves, ventilation |
| Sanding | Medium marks | Snapmaker: 180–220 grit, then up to 400 | Sand along the grain |
Brand blogs and maker forums, not lab tests. No source we found checks whether alcohol or mineral spirits harm a sealer applied before the laser.
Baking soda? We found no source that supports it as a soot cleaner. The only thread we found is about pre-treating wood with it for contrast: the maker reported black soot all over the engraving, and washing it off left the piece dull.
Which sandpaper grits work on laser-cut parts?
Each step has its own grit, according to the product pages and data sheets:
| Job | Grit | Source |
|---|---|---|
| Medium burn marks | 180–220, then finer up to 400, along the grain | Snapmaker |
| Fine clean-up of marks | 320–600 | OneLaser |
| After a water-based dye raises the grain | Pre-dampen with distilled water, then 220 | General Finishes |
| Between coats of water-based poly | 220 ("very fine") | Minwax Polycrylic |
| Between clear coats | 320, then fine steel wool | OMTech |
| Cured epoxy seal coat | 80–120, then wipe with denatured alcohol | TotalBoat Artist Resin data sheet |
| Next epoxy coat after 4 hours or more | No sanding needed | TotalBoat Artist Resin data sheet |
These sources are American and use the US CAMI grit scale. Paper sold in Europe is marked with FEPA "P" grades, a separate standard, so check the maker's chart if you need an exact match.
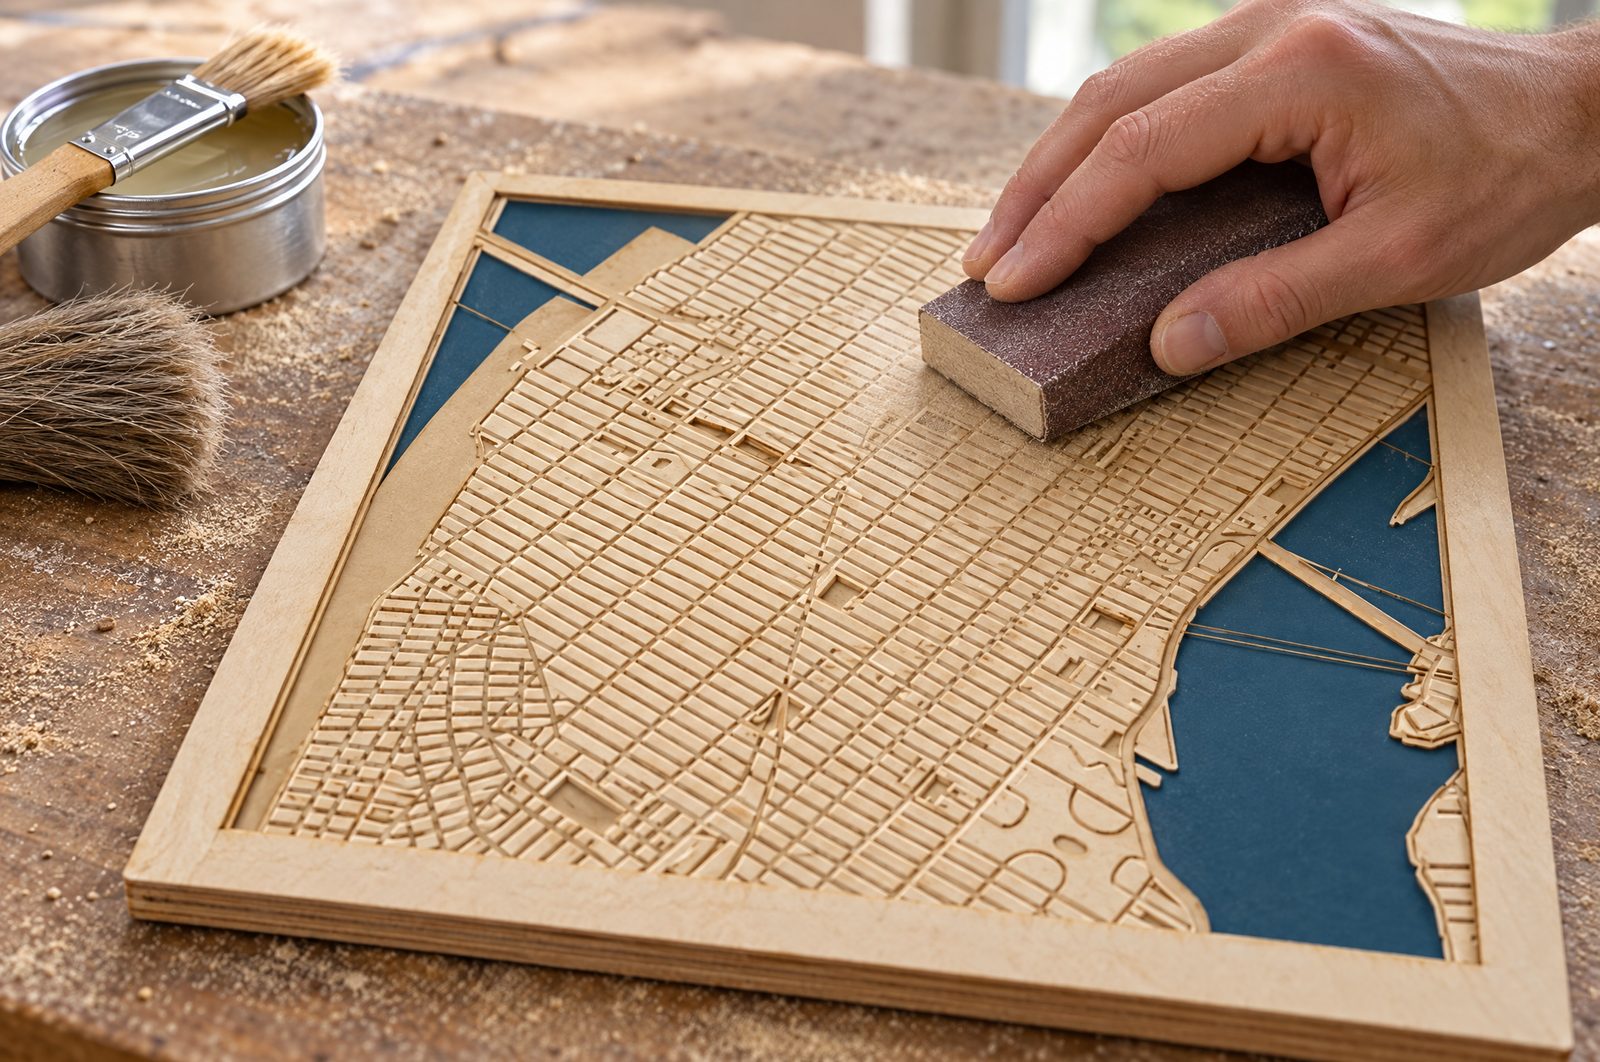
Magnuson Studio sands before the laser, not after. Small cut parts are hard to hold and easy to round over, so do the heavy sanding on the whole sheet (step 1 above).
Stain or dye: which colors plywood evenly?
Woodworker's Journal describes pigments as "colored dirt ground up into small particles", while dyes dissolve into "individual molecules". On maple, pigment stains "will wipe right off with little color change", and "any finish will go over any binder-free dye". General Finishes suggests dye when you want to show off the grain, and warns: "Once you use a Dye Stain, that is the color you are going to get." Water-based dyes also raise the grain more.
Blotchy birch. Minwax sells its Pre-Stain Wood Conditioner for "soft or porous woods like pine, alder, birch, and maple" and says to apply the stain within 2 hours. Birch is on that list, which matters for birch plywood maps. Poplar is not named, so test an offcut first. Species and grades are covered in our plywood guide.
A map precedent: one maker colored the water on a laser-cut topo map with blue water-based stain "at varying dilutions" for depth, then shellac. FSL, a laser maker, notes that oil-based stains increase flammability.
How do you paint-fill an engraving without bleeding?
Magnuson Studio explains the bleed: "Wood fibers and pores create tiny channels. Watery paint can travel through a raw engraved pocket, under the mask, and into the surrounding grain." The fix: seal the recess after engraving, before paint. Their example is Rust-Oleum's Clear B-I-N, a synthetic shellac. Other routes:
- A quick clear coat "can seal the wood to prevent bleeding" (The Handyman's Daughter).
- Spray, not brush: OMTech seals the pores with sprayed clear lacquer or poly, and sprays lacquer or enamel for color so it does not pool.
- A sanding sealer: Rust-Oleum calls Zinsser SealCoat "Compatible with ALL clear wood finishes", sanded and recoated "in minutes" (manufacturer claims; its data sheet would not open).
An older Sawmill Creek method (2009) uses sanding sealer and lacquer, then floor wax as a resist, then acrylic paint wiped off "across the grain". Fine for paint, but never on a part that will get epoxy: wax causes bare spots (ArtResin). Open question: does shellac applied before engraving change the engraving color or the fumes? We found no source, so run a test piece.
Which clear coat suits light plywood?
OMTech lists polyurethane, lacquer, varnish, shellac, oils (tung, linseed, Danish, mineral) and waxes, with wipe-on poly in thin coats and a sanding sealer on engineered woods. On pale birch or poplar, yellowing shows. Minwax sells its water-based Polycrylic as "non-yellowing, non-ambering" (manufacturer claim), with these numbers:
- Dry time 3 to 24 hours; recoat after 2 hours; sand with 220 grit between coats.
- Over Minwax's oil-based Wood Finish stain, wait at least 24 hours.
- It "should not be applied over red mahogany stains".
Wax is a fine final touch on parts that never meet resin, such as a frame.
Coating resin or casting resin: which one for a laser-cut map?
Epoxy comes in two families, and the difference is mostly layer thickness:
| Coating resin | Casting (deep-pour) resin | |
|---|---|---|
| Made for | Thin pours over a surface | Thick pours; low viscosity, "water-thin" |
| Depth per layer (ArtResin) | 1/8 to 1/4 in (about 3–6 mm) | 1 to 4 in (about 25–100 mm) or more |
| Cure (ArtResin) | Dry to touch in 24 h, full cure in 72 h | Up to 7 days |
| Example products | ArtResin, TotalBoat Artist Resin | TotalBoat Fathom |
| Works as a seal coat | Yes (TotalBoat Artist Resin) | No: Fathom "cures too slowly" |
| Batch size | TotalBoat Artist Resin castings: up to 10 fl oz (about 300 ml) mixed per pour | Fathom: at least 1/2 gallon (about 1.9 l) mixed |
| Fits a 3 mm map layer | Yes | Overkill |
Sources: ArtResin (casting vs epoxy, 31 Dec 2022), TotalBoat data sheets. Metric values are our conversions.
A lake cut through one 3 mm layer is one ArtResin pour and well inside TotalBoat Artist Resin's 1/4 in (6 mm) limit per coat. Deep-pour resin needs a big batch and days to cure: our editorial reading is that it is the wrong tool for map layers.
Real numbers from three data sheets
| Product | Type | Mix (by volume) | Working time | Touch dry / tack-free | Full cure | Max per layer | Temperature |
|---|---|---|---|---|---|---|---|
| ArtResin | Coating | 1:1 | About 45 min | About 24 h | 72 h | 1/8 in (3 mm) | 75–85°F (24–30°C) ideal |
| TotalBoat Artist Resin | Coating | 1A:1B | About 30 min at 70°F (21°C); pot life about 10 min | 6–8 h (sandable about 24 h, light use about 48 h) | 3–5 days | 1/4 in (6 mm) per coat; castings up to 2 in | 65–75°F (18–24°C), under 60% RH |
| TotalBoat Fathom | Deep pour | 2A:1B | Pot life 4–6 h | Demold after 48–72 h | 5–7 days | 2 in (slabs), 3 in (castings) | 60–80°F (16–27°C), 70°F optimal |
From the ArtResin FAQ and the TotalBoat instruction sheets and TDS, checked 24 September 2026. °C and mm are our conversions. Use the sheet for the exact product and batch you buy.
Manufacturer figures at their recommended temperature. ArtResin states 72 hours (3 days). Your room and layer thickness change the real time. Source: ArtResin FAQ and TotalBoat data sheets
Data table
| Resin | Full cure |
|---|---|
| ArtResin (coating resin) | 3 days |
| TotalBoat Artist Resin (coating resin) | 3–5 days |
| TotalBoat Fathom (deep-pour resin) | 5–7 days |
Recoating differs too. ArtResin waits 3–5 hours, until "a jelly like stage", and its 72-hour cure assumes a 1/8 in layer. TotalBoat Artist Resin recoats after 4 hours or more without sanding; Fathom when the layer is "below 85°F and is firm", typically after at least 36 hours. Warming the resin shortens its working time by about 10 minutes (ArtResin).
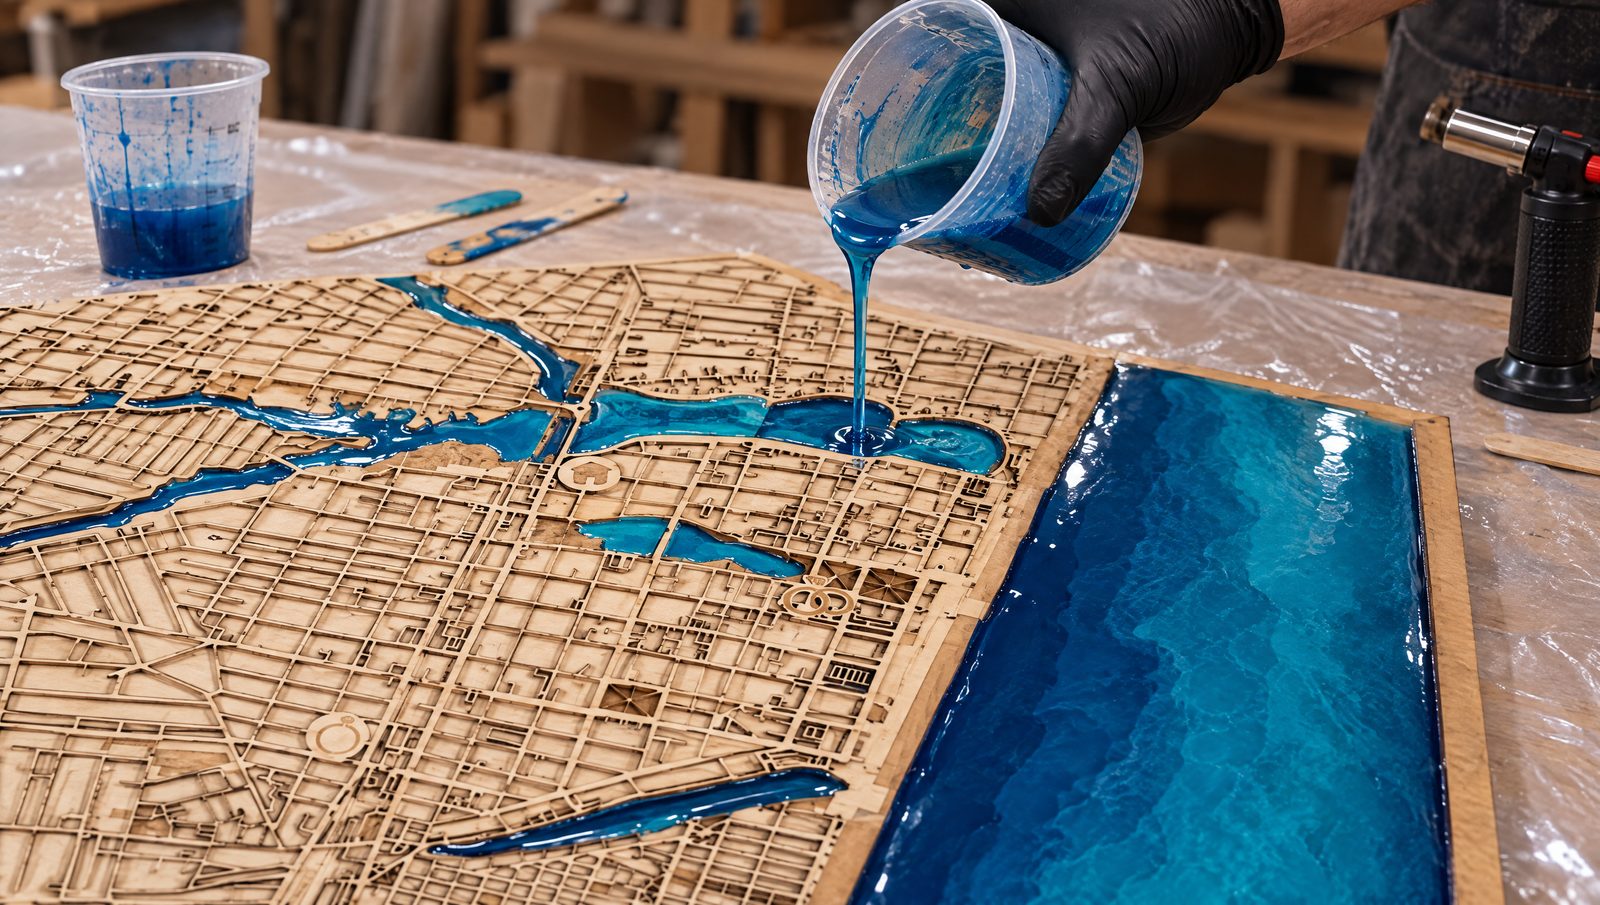
How do you fill a laser-cut lake or engraving with epoxy?
- Seal the wood. ArtResin warns that wood "may contain trapped air which can release into your resin as bubbles" and can absorb resin and darken; it suggests a spray or brush-on sealant, acrylic paint, PVA glue or acrylic gel medium. TotalBoat uses a thin seal coat of the epoxy itself as "an air-tight barrier": let it cure hard, sand with 80–120 grit, wipe with denatured alcohol.
- Keep it clean. Wax, grease, silicone, tape adhesive, stain oils and hand lotion cause bare spots (ArtResin).
- Mind the temperature. Air in wood outgasses "while the wood's temperature is rising" (Epoxyworks), so West System suggests applying epoxy "as the temperature is dropping", in a thinner coat.
- Measure exactly, stir slowly. Sticky resin usually comes from "inaccurate measuring, under-mixing, or curing in temperatures that are too cold" (ArtResin); overmixing traps bubbles (TotalBoat).
- Tint within limits: no more than 6% of total volume, "or the resin may not cure properly" (ArtResin). TotalBoat lists mica powders, pigment dispersions and alcohol inks.
- Pour thin and close to the surface. ArtResin says you can build up as thick as you like, as long as each layer is 1/8 in (3 mm).
- Pop the bubbles with a torch in a "quick, light pass"; a heat gun is "less precise" (ArtResin). TotalBoat: 6–8 in (15–20 cm) above the surface, always moving.
- Cure fully per your data sheet before framing or packing.
On the 3D city maps we make and sell in our own shop, Viperys Wall Art, the water is real EPODEX epoxy resin (EU shop · US shop) in three shades of blue, poured by hand, and it cures for 48 hours. The layers are poplar plywood; the solid pine frame is hand-waxed. Cure times differ by product (48 hours in our process, 72 for ArtResin, 3–5 days for TotalBoat Artist Resin), so follow your own sheet. Finished pieces: 3D epoxy maps; how they are built: Our Craft.
For water with depth steps, see how to make a lake depth map; the Maperivo Laser Map Designer gives you the layered file to start from.
Bubbles, bare spots, blush: what causes them and how do you fix them?
| Problem | Likely cause | Fix | Source |
|---|---|---|---|
| Bubbles rising from the wood | Air in the wood expands and outgasses as the wood warms | Seal coat first; pour as the temperature drops; thinner coats | Epoxyworks, West System, TotalBoat, ArtResin |
| Bubbles from mixing | Overmixing or fast stirring | Stir slowly, pour close to the surface, torch with a light pass | TotalBoat, ArtResin |
| Bare spots (resin pulls away) | Wax, grease, silicone, tape adhesive, stain oils, hand lotion; porous wood soaking resin in | Clean, pre-seal, no wax before resin | ArtResin |
| Dark, blotchy wood under resin | Wood absorbs the resin | Seal with PVA glue or acrylic gel medium first | ArtResin |
| Film on the surface (amine blush) | "A normal byproduct" of curing | Remove with water | West System |
| Cloudy resin | Moisture or humidity | Keep humidity low (TotalBoat Artist Resin: under 60% RH) | West System, TotalBoat |
| Still sticky after the full cure time | Inaccurate measuring, under-mixing, too cold; more than 6% colorant | Scrape off the uncured resin and pour a fresh, properly mixed coat | ArtResin |
Is epoxy food-safe, and will it last on a wall?
ArtResin says its resin is food-safe once fully cured and used as directed; the FAQ we read did not cite a regulation. US food-contact coatings fall under 21 CFR 175.300, which lists epoxy resins among permitted components, but a rule existing does not prove a given product meets it. A wall map is not a food surface: make no food-safety claims for decor at all.
On a wall, ArtResin says cured resin handles up to 120°F (50°C) and higher heat can permanently damage it. It contains UV and hindered amine light stabilizers, but deliberate UV exposure is not recommended, so keep resin pieces out of direct sun.
Sources
Checked 24 September 2026. Manufacturer data sheets and FAQs, brand how-to pages, one US regulation and maker forums. Forum posts are single reports, not tests.
- OMTech — How to finish laser engraved wood (updated 25 Aug 2026); How to clean laser engraved wood (updated 8 Sep 2025)
- Snapmaker — How to remove laser burn marks from wood (31 Dec 2024)
- Thunder Laser USA — Preventing burning when laser cutting (19 Dec 2020)
- OneLaser — How to get rid of laser cut burn marks (updated 31 Jul 2026)
- Epilog Laser — Wood engraving
- xTool — Avoid burn marks when laser engraving wood (updated 29 Jun 2026)
- LightBurn forum — How to clean wood after a laser engrave burn (18 Feb 2022); Baking soda trick leaves black residue (26 Sep 2020)
- Glowforge community — Cleaning MDF burn marks and soot (21 Mar 2021); Engraving: to mask or not to mask (3 Feb 2022)
- Magnuson Studio — Paint-fill laser engraving without bleeding (2 Aug 2026)
- The Handyman's Daughter — Paint fill laser engraving (updated 25 Oct 2024)
- Sawmill Creek — Wood engraved color fill (14 Jun 2009)
- Rust-Oleum — Zinsser SealCoat Universal Sanding Sealer
- Minwax — Polycrylic Protective Finish; Pre-Stain Wood Conditioner
- General Finishes — Why or when should I use dye stain
- Woodworker's Journal — Understanding stains: pigments and dyes (6 Sep 2014)
- The Shamblog — Making a laser-cut topo map: the build phase (19 Dec 2015)
- FSL — Preventing burning when laser cutting wood (29 Sep 2022)
- ArtResin — FAQ; Casting resin vs epoxy resin (31 Dec 2022); How thick can I pour ArtResin? (6 Feb 2019)
- ArtResin — How to resin wood (22 Jun 2018); Should I seal my artwork before I resin? (9 Mar 2022); Bare spots (2 Apr 2024)
- TotalBoat — Artist Resin instruction sheet and TDS; Fathom Deep Pour Epoxy instruction sheet and TDS
- West System — Epoxy problem solver FAQ
- Epoxyworks — Bubble-free epoxy coating
- eCFR — 21 CFR 175.300 Resinous and polymeric coatings
- Wikipedia — Sandpaper (CAMI and FEPA grading standards)
- Viperys Wall Art (our shop) — Our Craft